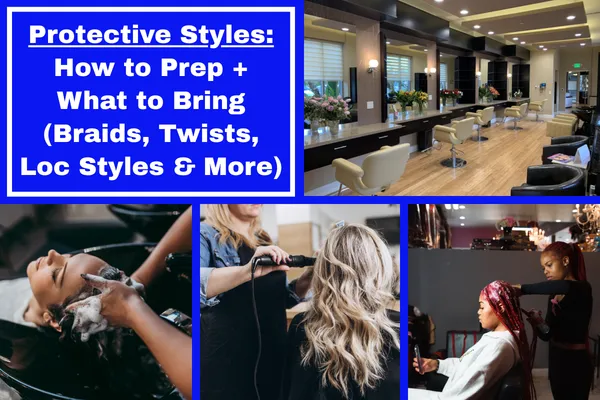
Protective Styles: How to Prep + What to Bring (Braids, Twists, Loc Styles & More)
Protective styles can save you time, help you retain length, and keep your hair looking put-together for weeks—but the results depend a lot on how you prep and what you show up with.
This guide covers exactly how to prepare, what to bring, and what to ask so your appointment goes smoothly and your style lasts.

What Counts as a “Protective Style”?
Protective styles typically tuck away your ends and reduce daily manipulation. Common options include:
Knotless box braids
Traditional box braids
Boho/gypsy braids
Stitch braids / feed-in braids
Twists (Senegalese, Marley, Passion)
Faux locs / soft locs
Cornrows under wigs
Crochet styles

24–72 Hours Before Your Appointment: How to Prep
1) Clarify the style + length + size
Before you arrive, confirm:
Style type (knotless, feed-in, twists, locs, etc.)
Length (mid-back, waist, butt-length)
Size (small/medium/large)
Parting preference (middle part, side part, no part)
Hair included or not (some braiders provide hair, many don’t)
Tip: If you’re unsure, send a photo and ask:
“Can you do this exact look? What length and how many packs?”

2) Wash (or confirm if they wash)
Some braiders require clean, product-free hair. Others offer wash/blow-dry add-ons.
If you’re washing at home:
Shampoo + condition well
Detangle thoroughly (this matters more than people think)
Avoid heavy oils/creams right before (can cause slipping)
If you’re not washing at home, ask:
“Do you offer wash + blow-dry, and is it included or extra?”

3) Blow-dry and stretch (unless told otherwise)
Most braid styles are easiest to install on stretched hair.
Ask your braider what they prefer:
Blow-dried / stretched (common requirement)
Lightly stretched (for some twist styles)
Natural texture (sometimes preferred for specific looks)
If you’re blow-drying at home, aim for dry and fully detangled.

4) Scalp check (don’t ignore this)
If your scalp is irritated, tender, or you have flakes/soreness, address it before braids.
Gentle shampoo
Light scalp oil (not heavy)
Avoid scratching and tight styles beforehand
If you have sensitive edges, tell your braider in advance:
“My edges are sensitive—please keep tension low.”

5) Know your time + budget
Protective styles are time-heavy. Be realistic:
Small/long styles take longer
Boho adds time
Added curls/leave-out adds time
Confirm:
deposit amount
remaining balance due
accepted payment methods
late policy

What to Bring to Your Appointment (Checklist)

Hair + accessories (most important)
Bring exactly what your braider requests. If they didn’t specify, here’s what to ask and what’s common:
✅ Braiding hair (brand + number of packs)
✅ Human hair bundles (for boho/gypsy pieces, if needed)
✅ Crochet hair (for crochet installs)
✅ Rubber bands (if you’re doing small sections)
✅ Hair jewelry (cuffs, beads, string, charms)
✅ Edge control (only if requested—some braiders provide)
Ask this question every time:
“What hair do you recommend and how many packs for my size/length?”

Comfort + sanity items (you’ll thank yourself)
✅ Water
✅ Snack/light meal (especially for long appointments)
✅ Phone charger/power bank
✅ Headphones
✅ Something to do (download a show/podcast ahead of time)
✅ Hoodie or small blanket (salons can be cold)
Aftercare items (have them ready at home)
You don’t have to bring these, but you should plan for them:
✅ Satin bonnet or scarf
✅ Silk pillowcase (backup)
✅ Scalp oil (lightweight)
✅ Mousse/foam wrap (to reduce frizz)
✅ Edge brush (if you do edges)

What to Ask Your Braider (So You Don’t Get Surprised)
Use these questions before you book or before you show up:
“Do I need to come washed and blow-dried?”
“What hair do you recommend and how many packs?”
“What’s the estimated time for this size and length?”
“Are you okay with low tension? My scalp is sensitive.”
“Do you dip the ends? Is that included?”
“Do you offer touch-ups or take-down services?”
“What should I do to maintain it between now and my next appointment?”

How to Make Your Protective Style Last Longer (Simple Habits)
Night routine (non-negotiable)
Wrap with a satin scarf/bonnet
Tie down edges if you wear them
For long styles, loosely braid/pony the length so it doesn’t tangle
Keep your scalp clean (without ruining the style)
Use a diluted shampoo or scalp cleanser (lightly)
Focus on scalp, not the full length
Pat dry and let fully dry
Reduce frizz
Apply mousse/foam, then wrap with scarf for 10–20 minutes
Avoid heavy oils/creams on the braids (can attract buildup)
Don’t keep it in too long
Most protective styles look best for 4–8 weeks depending on:
style size
hair growth
scalp health
tension and maintenance
If your scalp is itching nonstop or edges feel stressed, it’s time to remove.
Quick Prep Timeline
3–7 days before: choose style photo + confirm hair packs + confirm time/cost
24–72 hours before: wash, detangle, blow-dry/stretch (if required)
Day of: arrive on time with hair, charger, snacks, and a reference photo
Ready to Book a Braider in Michigan?
Browse braiders near you and look for listings that mention:
knotless, feed-ins, boho, twists, faux locs, crochet, wash/blow-dry, and low-tension installs.

FAQ
Should I wash my hair before braids?
Usually yes, unless your braider offers wash/blow-dry and you’ve confirmed it.
Do I have to blow-dry first?
Many braiders prefer stretched hair for clean parts and faster installs. Ask your braider’s requirement.
How many packs of hair do I need?
It depends on size and length. Always ask for a specific pack count based on your inspiration photo.
How do I stop itching after braids?
Itching can come from product buildup, tension, or sensitivity to the hair. Keep the scalp clean, use lightweight oil, and avoid tight installs.
